In my last #NailTechNailedIt post, I showed two Halloween manis, and my most recent post was a menu of Halloween looks I'm hoping clients will want to try on their manis or pedis. While I didn't have much luck getting real, paying clients to try the looks yet, I was able to practice one on another student, and I did some acrylic claws/rounded off stilettos on my friend last night. She will be going as a scary goth girl.
To get you in the spirit of tomorrow's holiday, here are those two looks!
What will you be dressing as this year? I'll be Duff Man (from the TV show The Simpsons). I think beer nails will be appropriate for the look.
Do you have any plans to incorporate your nails into your costume?
One Night Spooky Stand
Tomorrow in the salon, I'm going to be displaying this Halloween-themed menu to encourage clients to try out some nail art! I kept the designs relatively simple to accommodate for time.
Which would you pick if your salon was offering it?
#NailTechNailedIt: Weeks 8 through 11
![]() |
A candid shot of me doing Rachel's nail art (at the bottom of this post). |
- Acrylic enhancements, including;
- Odorless product
- Traditional monomer/polymer powder products
- Brush technique
- Enhancements on tips
- Enhancements on forms
- Electric files
- Hair removal
There are so many factors to consider when working with acrylics, which is the generic term for nail enhancements that use monomer liquid and polymer powder.
First, if your client wants to elongate their nails (as most do), should you do the service with a tip, or with a form? If you use a form, do they want the two-color method (forming a white tip with white powder) or the one-color method (where you can choose to only use pink powder)? Whether their nails be constantly painted is a big determinant for this decision.
Second, which product works best for you and your client? Some products are odorless. If you've been around a salon that was performing an acrylic service, you've probably smelled the products. I don't think it's a bad smell necessarily, but it is pungent, so a sensitive client who understands the products may insist on an odorless combination. (It's not actually odorless, it's just less odor.) Unfortunately, whether you want to or not, you need to be skilled in using odorless, because Colorado's state board requires the use of odorless products. I'm still undecided about which I prefer. One thing that I did quickly realize is that odorless products dry more slowly. So to learn, they are a great medium, as you have more time to sculpt and work the product to look like you want.
Acrylic application is actually a lot about the size brush you use. The brush sizes vary, usually in increments of 2. So 2, 4, 6, 8, 24! I've never seen a size 24 brush in person, but searching online has revealed that they do exist. Has anyone used that size? I'd love to get some nail tech chatter going about the preferred size, manufacturer, and shape of brush to apply acrylics!
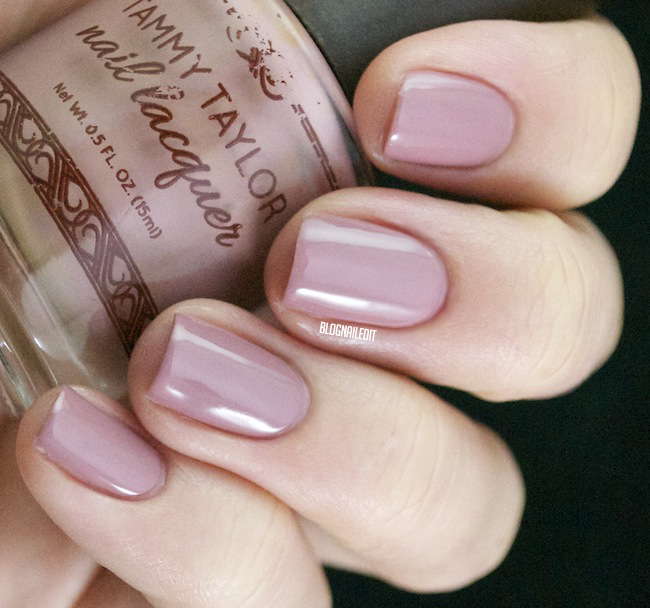
Mastering acrylics hasn't come to me yet. I imagine it will take lots of practice! I have laid a set on a friend in the salon though, and so far, they're holding up! It's been about a week. Here's what they looked like after application and polishing was complete:
The polish did a nice job of covering up some of the flaws, but you can see edges that aren't completely clean, and I worry that they will lift. After a week though, they're still on, and the gal wearing them is a hair student, whose hands are constantly in water.
This week, we started learning about the electric file. I feel like Rosie Riveter when I use power tools like that, and I can't wait to use it to smooth out enhancements and edges! Hopefully that will make my acrylics more beautiful than anything!
Using the file is really an art form. There's a dance between speed and pressure required to use the drill comfortably for yourself and your client. Too much of one or the other will result in pain, heat, or what is unfortunately called "Ring of Fire". (No...not the feeling after a fiery burrito, or an after-birth effect. Gross guys.)
Electric files have become much more strictly monitored in salons. In previous years, salons would run out to Home Depot and buy dremels to use on their clients. This led to all kinds of problems, so an agency called AEFM (Association of Electric File Manufacturers) stepped up and started providing education on the proper use of electric files. It's now a recognized seal, and if you want to be electric file certified, you want to attend classes with that seal of approval. At the end of our classes, we will be certified in that manner.
One final big thing I picked up in class is hair removal. As a nail tech, I'm allowed to wax clients from their toes to their knees, and from their fingers to their elbows. Not gonna lie...it's not really a service I love, but, it's something I can say I know how to do, and would bolster my resume when it comes time to look for a job in the industry. One problem I foresee is that I learned on a very specific kind of waxing technique. It's not the wax that hardens, it actually stays warm as you apply it to the leg, and melts more if you rub it on the leg. Or arm. Or toe. Yeah...waxing toes is something I've now done. o_o
With Halloween just around the corner, I'm hoping with all hope that clients will want some fun nail art this weekend! Luckily, last night during class, a client came in, and the student who was scheduled to perform her manicure was not in. So I did an emergency manicurotomy and stepped up. The client was a blast to talk to, and she had brought stickers to doll up her nails! I recommended we do something more unique, and offered to do some nail art on her. She agreed, and here's what we did:
Cute! We did this on regular polish (a bright orange-red from OPI called My Chihuahua Bites!).
After her, Rachel (my classmate), also wanted some subtle nail art. We did her's with Gelish, and spooked it up with some bats flying past moons:
So my questions for you nail techs are as follows:
- What's your favorite size brush for applying acrylics?
- Is there a brand you recommend buying?
- Which shape of brush do you like?
tags:
acrylics
,
electric file
,
halloween
,
nail enhancements
,
nailtechnailedit
USpicy UV Lamp Review
No nail art tonight. Womp womp.
But I do have an interesting tool to review, that some of you will find helpful! A UV lamp!
The lamp is simple, easy to use, and effective. Plus, it's a huge bargain!
USpicy carries a variety of lamps, but the one I was sent to review specifically is the Eclair 9W lamp. The light doesn't have a timer, and it is UV (not LED).
I used it to test out a gel polish (reviewed in another post later) and was pleased! The little lamp did its job just perfectly. It doesn't heat up to a level of discomfort to any degree. It's not loud and buzzy like some other lamps I've used. Though I wish it had a timer to make working with clients easier, it's not something you absolutely need, especially if you're working at home on yourself, which is more what I see this lamp being used as. There's only enough room in it for one hand, and getting the thumb in too is a little awkward, but doable.
In addition to the included lamp and bulb comes a file and some fantastic gloves.
I don't know how practical the gloves are, as they reach up past my elbow, but it sure makes me want to go to a ball. And every pretty girl deserves to go to a ball!
They do actually provide a comfortable amount of warmth while typing, as I'm realizing, finishing up this post. And I just feel fabulous!
I have no complaints about this light! I'd highly recommend it if you're looking for a good starter light to get gel manicures at home! Make sure that 9W is enough for your polish to cure, as some require stronger wattage to properly cure all the way. Each gel is different, so just check the manufacturer's recommendations.
It's available most readily for purchase through Amazon, for the ridiculously low price of $18.95! Buy it here!
This product was sent to me by USpicy. The review is based entirely on my experience with the product and was in no way influenced by anyone.
But I do have an interesting tool to review, that some of you will find helpful! A UV lamp!
The lamp is simple, easy to use, and effective. Plus, it's a huge bargain!
USpicy carries a variety of lamps, but the one I was sent to review specifically is the Eclair 9W lamp. The light doesn't have a timer, and it is UV (not LED).
I used it to test out a gel polish (reviewed in another post later) and was pleased! The little lamp did its job just perfectly. It doesn't heat up to a level of discomfort to any degree. It's not loud and buzzy like some other lamps I've used. Though I wish it had a timer to make working with clients easier, it's not something you absolutely need, especially if you're working at home on yourself, which is more what I see this lamp being used as. There's only enough room in it for one hand, and getting the thumb in too is a little awkward, but doable.
In addition to the included lamp and bulb comes a file and some fantastic gloves.
I don't know how practical the gloves are, as they reach up past my elbow, but it sure makes me want to go to a ball. And every pretty girl deserves to go to a ball!
![]() |
Source |
I have no complaints about this light! I'd highly recommend it if you're looking for a good starter light to get gel manicures at home! Make sure that 9W is enough for your polish to cure, as some require stronger wattage to properly cure all the way. Each gel is different, so just check the manufacturer's recommendations.
It's available most readily for purchase through Amazon, for the ridiculously low price of $18.95! Buy it here!
This product was sent to me by USpicy. The review is based entirely on my experience with the product and was in no way influenced by anyone.
Copper Snowflakes
Is it fall? Is it winter? Will it snow or will the yellow and orange leaves hit the deck first?
This copper conundrum happening all over Colorado can be captured in one polish from Born Pretty Store. The polish I'm talking about is a lovely mix of copper and matte white hexagonal glitter, and some feather white stick-like glitter. Just like the leaves and snow!
Here's the nail art I came up with for the polish:
And here's what it looks like in the bottle.
This was a good glitter, easy to apply. It also had pretty even coverage, surprising enough. Glitters are difficult to lay evenly, but this one was fine. At least in the amounts I used it for.
The other colors used in the nail art were A-Piers to Be Tan (OPI), Decoded (ORLY) and Mermaid (Tammy Taylor). Seems tribal, which was what I originally thought the polish was called.
You can pick up this polish (called #5 in this link here) for under $4.00, and don't forget the 10% unlimited coupon code, C10X31.
This product was sent to me by Born Pretty Store. The review is based entirely on my experience with the product and was in no way influenced by anyone.
tags:
born pretty
,
glitter
,
nail art
,
review
,
tribal
Tammy Taylor Review
According to the world's most reliable source for holiday information, Twitter, today happens to be National Dessert Day. I don't know how else to celebrate this national holiday besides eating at least one tempting treat and then incorporating that same guilt into a delicious mani.
For inspiration, I turned to my ever-growing pile hill mountain of unreviewed products, and my eyes fell on the Tammy Taylor products. Right away, the pot of loose glitter called Twirl 'a' Whirl caught my eye. Its irridescent flakes reminded me of sugar, so I started that as a design for nails, and then went absolutely crazy with some freehand ice cream cones.
A freezer full of frozen chicken at freezer-burned berries just doesn't nail the sweet tooth craving like ice cream, so I'll stick to celebrating the holiday on my nails only.
Tammy Taylor products are probably some that untrained nail techs haven't heard of. I definitely hadn't before starting school, but now that I have, I realize that the company is a standard brand in nail technology. The products are excellent from what I've experienced!
The first color I'm showing tonight is the blue from ice cream, Mermaid.
I used 2 coats for this swatch, but almost got away with just one. The powder blue creme is great for nail art!
Cappuccino was also used in the ice cream nail art, to add the waffle lines to the cone. (Waffles sound unbelievably delicious right now.) This also used 2 coats, and is a reddish-tan color terrible for my skin tone. It doesn't mean it's a terrible color though!
Coral Sunset also used two coats. (In fact, all the polishes I'm showing required only two coats for the correct opacity. Two coats is the standard.) This reddy coral is more red than the polish I'm showing next, and appears brighter in real life than I've captured here.
Over the Top, while close to Coral Sunset, has more pink. It's not neon, but it's definitely a hot pink! Two coats again.
Gettin' My Mauve On is a mauve color straight out of a 50s living room. It's redder than Cappuccino, and I think my swatch did a good job of capturing that. The bottles are harder to tell apart than the swatches. Again...2 coats.
Mango Tango is a rich addition to my collection! It's a crelly (creme-jelly), so its texture is different than the others, but even with just 2 coats (shown), it covers perfectly. It's a hot orange-red, though it looks just red in the swatch. This was the cherry on my cones.
Finally we have Thrill Ride. Though it dries somewhat sation-matte, a layer of top coat shines it up nicely, to make it the exact color of a Crayola marker. It pops, and I love the color on my nails. As usual, this was two coats.
Not being shown today, but coming highly recommended by me is the Tammy Taylor peach cuticle oil. Son of a PEACH that stuff smells good! My love affair with the almond cuticle oil from CND is still strong, but this peach goodness is gaining traction faster than ice melting on a stove. It's absolutely amazing, and a nice, bright, tangy change from the sweet, nutty aroma almond oil has.
Tammy Taylor products are available online at their website. The polishes are $6.95 each.
I like the ease of application of the polishes and, as mentioned, I'm obsessed with the cuticle oil. I'd recommend trying these products out. Additionally, I've heard great things from my instructor about Tammy Taylor's other products, including her acrylics. I've spent some time online looking through sites relating, and found an awesome, informative channel where Tammy Taylor's techniques are shown. I've referenced them plenty since finding them!
Which color is your favorite? Did you celebrate National Dessert Day? (There's still time! It's only 11:15 MST, and only 10:15 in California!)
These products were sent to me by Tammy Taylor. The reviews are based entirely on my experience with the products and were in no way influenced by anyone.
Winstonia Series 1 Stamping Plate Review
Recently on Nailed It, you may have noticed a revival in stamping. That continues tonight with a review of one of the plates in Winstonia Store's Series 1 stamping plates.
I used the large floral pattern, as well as it's smaller counterpart for my design tonight, as well as a 3D fimo flower for my thumb!
I had no problem with these stamps. They transferred easily and all the lines and details translated perfectly.
Below is a shot of the plate I used, which includes several other floral ideas:
The series also comes with 3 other plates:
This series of plates comes at a really low price. All four are available here for $4.95! SO CHEAP!
Which plate is your favorite? Which design is your favorite?
These products were sent to me by Winstonia. The reviews are based entirely on my experience with the products and were in no way influenced by anyone.
I used the large floral pattern, as well as it's smaller counterpart for my design tonight, as well as a 3D fimo flower for my thumb!
I had no problem with these stamps. They transferred easily and all the lines and details translated perfectly.
Below is a shot of the plate I used, which includes several other floral ideas:
The series also comes with 3 other plates:
![]() |
Image courtesy of Winstonia Store |
![]() |
Image courtesy of Winstonia Store |
![]() |
Image courtesy of Winstonia Store |
Which plate is your favorite? Which design is your favorite?
These products were sent to me by Winstonia. The reviews are based entirely on my experience with the products and were in no way influenced by anyone.
Cacee Polish - BFE Summer Collection
Primary colors are special and great. We all grew up on crayons and markers and chalk in primary colors. It makes sense that we are always drawn to them, even after we've digested all our crayons and turned our toilet bowls into colorful rainbow movements.
That was a disgusting thing to say, I'm sorry. Maybe this will make it better!!!
This design was done with five of the six colors I'm reviewing tonight. These colors from a polish line called Cacee.
The first color is Tiffany. This silky baby pink is such a black sheep in the collection, I'm totally confused by it. It is a silky satin, while all the others are cremes. What?! It took 3 coats on the thicker side to get here. I didn't much like it, but it's the only one I felt like that about.
Tami is my favorite in the collection. It's a neon coral, requiring three coats. I hate my camera for ruining it. It's so much brighter and warmer, and doesn't blend into the skin tones as well.
See the way Whitley stands out against my skin? That's how Tami should be. Whitley is an uneven, patchy polish, and it took four coats to get this opaque. The color is great though! It's like mango. Yum!
Lena is a grassy neon green of three coats. Very smooth looking!
Melanie is a perfect sky blue, and it only needed 2 coats.
Dianna also only needs two coats. It's more magenta-y than lavender.
Primary colors. Crayons. Joy. They're all synonymous in my mind!
Cacee polish is available in lots of nail supply stores. I found it in my local one, AAA Nail Supply in Broomfield. I'm not sure how much they retail for, but I'll find out and update the post when I do!
These products were sent to me by Cacee. The reviews are based entirely on my experience with the products and were in no way influenced by anyone.
Subscribe to:
Posts
(
Atom
)