Showing posts with label studs. Show all posts

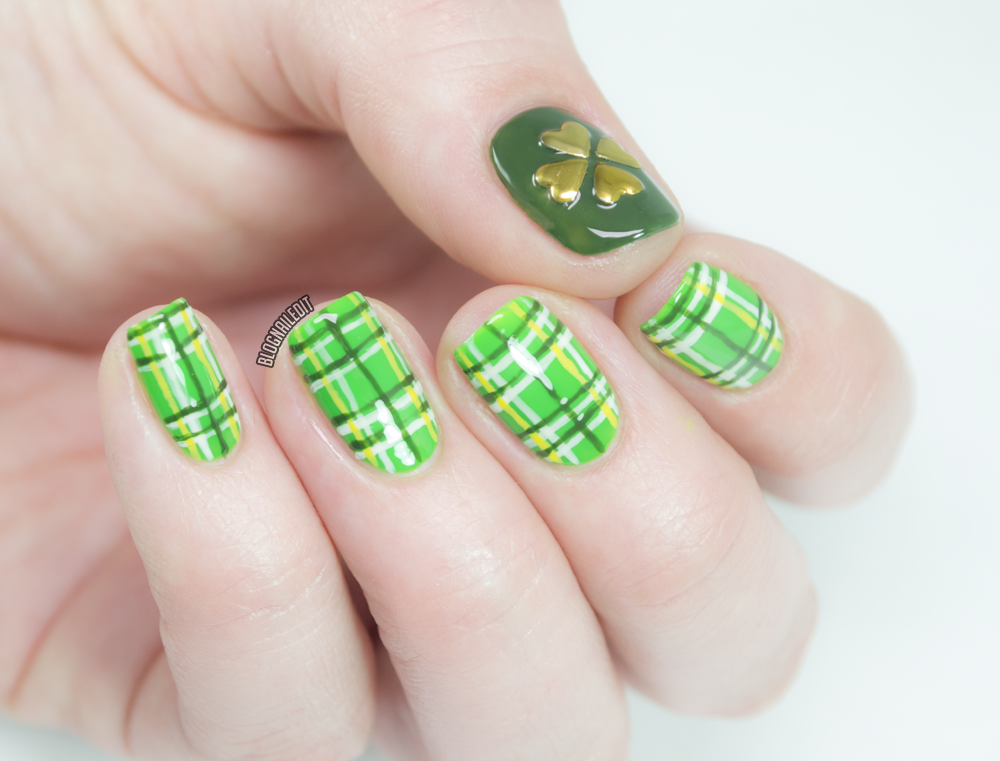
Irish Tartan

St. Patrick's Day has always been a big holiday here on the blog (from shamrocks to bejeweled greens and glittering lines). I'll use any holiday as an excuse for fantastic nail art though, and I'm really happy with this one.

I was inspired by, surprisingly, cookies created by Instagram user @gimmesugah for this design. Misty did a lovely interpretation of a green tartan/plaid on her cookies, and that pattern struck me so much I wanted to recreate it.

St. Patrick's Day Nails

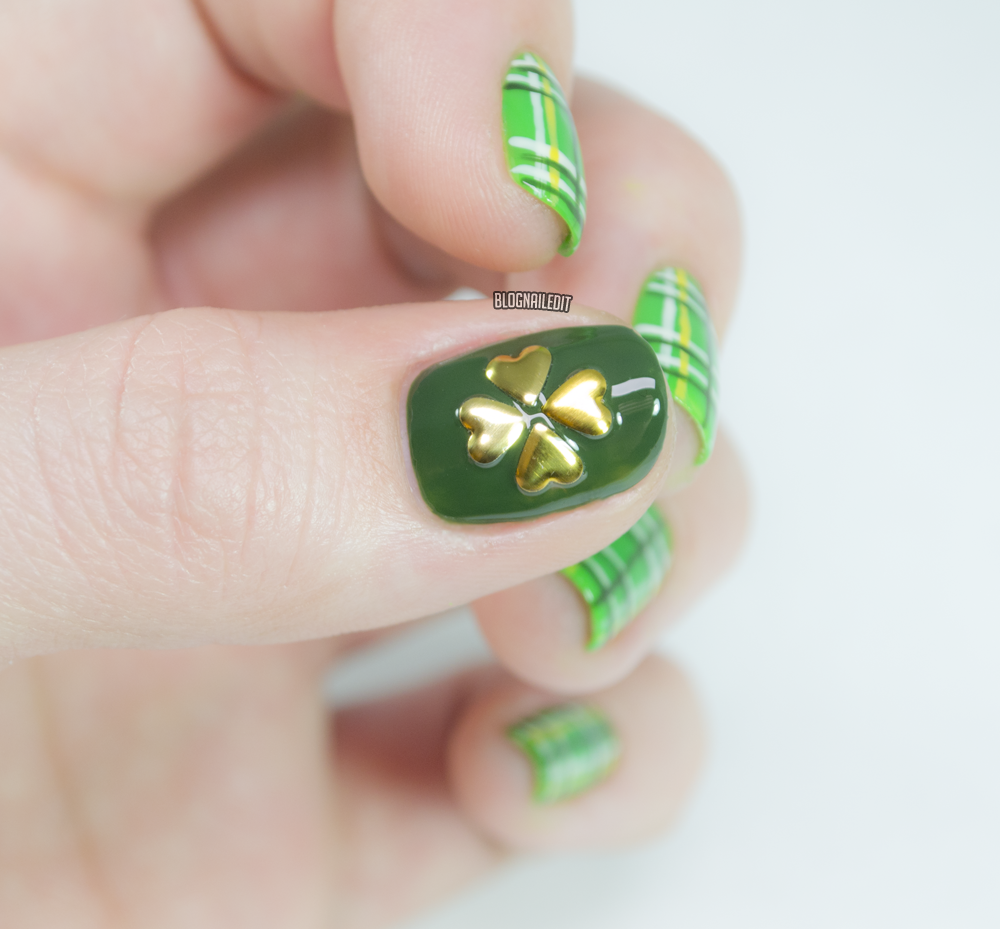
I used a pretty random selection of polishes for this design too. The dark green is Emerald Tower (lakur), the white is Look, Don't Tusk (Color Club), the light green is Kiwi Cool-ada (China Glaze), and the yellow is Sunshine (Barielle). I also used some Born Pretty Store heart-shaped studs flipped on their heads to make a perfect little four leaf clover on my thumb.

Four Leaf Clover Nails

I hope everyone has a wonderful week and celebrates St. Patrick's Day your favorite way!

Born Pretty Store Fantastic Mini Round Patterned Metallic Stud #3 Review

Tonight's post features some great holographic studs from Born Pretty Store. To save you some trouble searching the BPS database of studs, here's the link directly to the studs, which are pattern #3.


The studs are metallic looking, but they're plastic themselves. They're 3mm x 3mm, which means very little to most people, so here's how they look on my nails!


Super holographic aren't they? I put them in some pastel bubbles, because the holographic shade reminded me of the look of bubbles.

They come in a package like the one shown below:


To order your package, visit Born Pretty Store here, and don't forget to use my coupon code C10X31 for 10% off, and as always, you get free shipping on any order!

The products in this post were sent for review purposes. The reviews are based entirely on my experience with the products and were in no way influenced by anyone.

Punk Rock Rings from Born Pretty Store

Today's manicure is inspired by the punk skulls and painful piercings of punk rock culture (or at least how it's embodied in my mind).


Born Pretty Store, the well-stocked e-tailor of fashion accessories including a huge variety of nail art supplies, sent me a set of rhinestone studs and gold rings. They roll together in a nail art wheel, and the rings can be pried apart to pinch around the tip of your nail, faking a pierced look.


I wouldn't actually wear these anywhere, but I'll wear them for the art of the look!

I hand painted the skull (using this design as a guide) using black polish and a tiny detailing brush I picked up at Sally's. The neon polish underneath is OPI's new one, Life Gave Me Lemons.

This nail art wheel is available for $3.95 from Born Pretty Store (10% off with my coupon code C10X31), and shipping worldwide is FREE! No excuse not to give it a try.

What do you think of the punk rock rings? Are they too impractical for you, or would you give them a try sometime? I know I certainly couldn't regularly rock them, but might pull them out come Halloween!

These products were sent to me by Born Pretty Store. The reviews are based entirely on my experience with the products and were in no way influenced by anyone.
LVX Summer 2013 Collection Swatches & Review

TGIF!

Last night's nail networking event was a wonderful opportunity to meet women in the business and meet new faces. I had a great time, and even won a raffle for a new smock! If you live in Colorado, I would definitely recommend attending Nail Talk Denver's next event.


Tonight I'm showing the summer 2013 collection from LVX, a polish line devoted to matching and predicting the world's top fashion lines' colors and trends. They're a luxury line, running at $16 per bottle. 

The summer 2013 collection has 6 really pretty colors that align with specific spring/summer fashion trends. Click each color's below name to see which designs inspired it.
These gorgeous light shades really inspired me to create a soft, watercolor look. But then when I started mixing the colors, they felt tribal, so I did some simple geometric overlaps to change it up. Here's the final look I came up with:


The studs were purchased from Born Pretty Store. The technique I used is widely known as the watercolor technique, and I put a little bit of a spin on it.

First, I polished a base of the tan color (Rive, which you'll see after the jump). Then, I used a small detail brush (not as thin as a striper) to dip into three of the other colors, individually. Before striping on the colors in random patches, I dipped the brush in acetone, so it was washed out when I applied it. The whole look needs a good, random touch, so it's a great beginner technique!

Now let's look at the rest of the swatches!

Winstonia July Grab Bag

There's another Winstonia grab bag available, and I love this one! It's available for $10 (free shipping) until July 31. If you like what you're about to see (and I bet you will), then you can pick it up here at the Winstonia Store.


This month's bag includes:
  • 2 nail art stud wheels (Design 2) (Design 3)
  • 1 nail art polymer slice wheel (details)
  • A package of wooden cuticle pushers in 3 different sizes (details)
  • A multi-purpose eye brush (details)
Overall, it's a $24 value that you're getting for $10.

I loved the nail art studs the most, so I created a look using several different kinds of studs from the two kits.


So fun right?!

Here's a closer look at what's available in each of the wheels:


I love the variety, and I definitely feel like I'm getting a value.

And though the brush is advertised as a makeup brush, I'll likely be using the angled end as a cleanup tool for my cuticles!

This is an excellent 3D grab bag, which reminds me...time to announce the winner of my 3D nail art contest!

Though it was difficult to choose and I feel bad not letting more than one person win, I decided on a winner:

Ria Marii from Brush me Blush!

Nail art and photo by Ria Marii from Brush Me Blush
She was very creative and neat with her 3D work, and I'm so happy I now know about her blog. Well done Ria!

Edit: It's my own fault that I did not ask people to prove it was their natural nail as the rules stated was a requirement, so though there has been controversy about whether or not these are her natural nails, I unfortunately have to go by the honor code in this instance. Ria assured me they were her natural nails, and I'm sorry if some of you disagree. I myself am not 100% confident either, but I put myself between a rock and hard place by not asking for proof. It is what it is now. I will be removing comments calling out these facts, simply because it's not worth generating additional controversy. Again, I apologize to everyone.

If you've got the 3D itch and want the July Winstonia grab bag, then you can grab yours in the Winstonia store until July 31st for $10 with free shipping and no subscription required.

These products were sent to me by Winstonia. The reviews are based entirely on my experience with the products and were in no way influenced by anyone.

Grungy Glamour

I can't get enough of gradients, or as they're more and more often called, ombre.

My hair's got an ombre gradient, my favorite, albeit holey, sweater has a gradient, and my favorites on Instagram often contain a gradient.


This grungy gradient was inspired by this pin of ombre tights. The purple is from Savina, and it's called Dream. It also uses Black Onyx from OPI. The square studs are my package of Born Pretty Store square studs that I reviewed here. 

Born Pretty Store 2mm Silver Square Studs Review

3D nail art is slowly making its way into my heart. I don't think I'll be doing any landscaping on my nails anytime soon, or chaining my fingernails together as a form of art, but, never say never!

In the meantime, I'm sticking to the simple 3D objects, one of which are these 2 mm silver square studs from Born Pretty Store.


Studs are so easy to use, and you can really get some cool designs. I decided to do a skittles manicure, using all sorts of different designs for the studs. I don't think I can pick a favorite design here, I love them all so much.

I used a tiny bit of nail glue on the backs of each stud to adhere them to my nail nice and strong. I don't want to wake up in the morning with snagged studs all over my pillow and hair. That would be no bueno. Instead, the glue secures them, and then I layer one top coat on top as well, for extra coverage and smoother edges. Sometimes that causes bubbles though, so be careful with your top coat application!

You can pick up these silver studs from Born Pretty Store for just under $6 here. They also have gold studs, larger squares, circles, and different colors for the circles. They also have odd shapes, like the marquis shapes I showed you a few days ago. You get a large bagful, so you won't be running out anytime soon.

Oh by the way, I used Grape (Savina) and Wednesday (Zoya) for the colors.

Don't forget to take 10% off your order, with the code C10X31.


These products were sent to me by Born Pretty. The reviews are based entirely on my experience with the products and were in no way influenced by anyone.

Marquise Stud Review from Born Pretty Store

After a few very blingy guest posts, I needed to get a little blingy myself.

I used the marquise studs from Born Pretty Store to bling out this manicure.


These shapes are larger than most of the studs I own already, and with my littler nails, I'm more limited to what I can do. I love them though, and the fact that three little studs can outline the shape of my cuticle perfectly and create a perfect design.

The base color is Road House Blues from OPI.

You can pick up a pack of studs like these from Born Pretty Store here for just under $6. Due to their odd shape and larger size, I recommend gluing them down rather than using just a topcoat to hold them.

If you place an order, use a 10% off code to deduct some more from your purchase: C10X31


These products were sent to me by Born Pretty. The reviews are based entirely on my experience with the products and were in no way influenced by anyone.

Guest Post from Finger Painted

Happy (or is it Merry?) New Year's Eve everyone! I love New Year's Eve, as it always gives me a good excuse to get dolled up for no real reason other than to party!

For today's guest post, I thought the most appropriate nails were these ultra-blingy nails from Lexi at Finger Painted. I love these so much!


Hey everyone! I'm Lexi from Finger Painted. I was so excited to be one of Katy's guest posters! I wasn't sure what I wanted to do at first but Katy said she'd love something blingy and glitzy for New Years...so out came the rhinestones!


I used China Glaze White on White and painted the black shapes with acrylic paint. I sealed it all in with 2 coats of Poshé and then used some nail glue to stick on all of my studs and stones to make sure they stay put. The little black ones are from a nail wheel from icing. I was shocked they actually had some really cool nail art accessories! The larger silver stones are from Poochiez Nail Art Boutique and I don't remember where the other ones came from. Haha.


These were partially inspired by one of my new phone cases (purchased here). I didn't have the right colors stones to match it exactly so I just went with black and white.


Thats all for my post! If you want to come visit me I'm on Blogger, Tumblr and Instagram!

Thanks again to Katy for having me!

●Lexi●


Oh Lexi that was fabulous! I wish I had time to do my nails like that for New Years!