Zoya Transitional 2016 Collection with Whispers

The Whispers collection from Zoya, available now and here, is a nice option for those ready to give up their winter shades for spring, but aren't quite ready to go full blown pastel. This transitional collection features 6 soft, muted shades, with color that gets you in the mood for more sun and flowers!

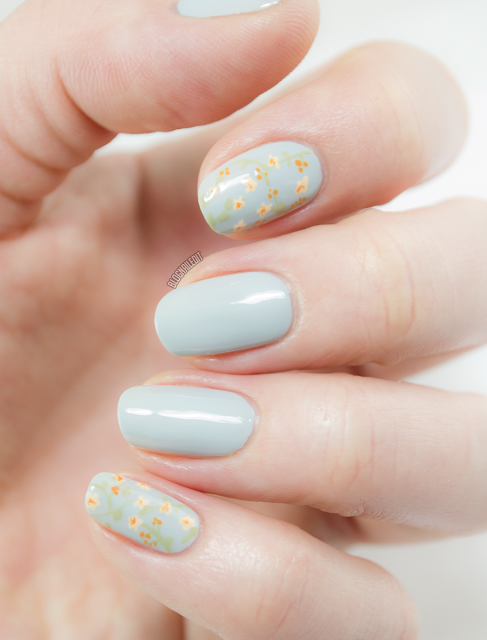
I liked the idea of spring bloom, so here's a cute little floral look on one of the Whispers shades, Lake.

Whispering Petals by Katy @ Nailed It
Whispering Petals

I also used Ireland for the stems and leaves, and mixed a non-Whispers Zoya color, Arizona, with white to get the petals of the flowers. I also used it for the detail colors on the flowers.

Now let's transition into the swatches. ;)

Whispers Swatches

All the Whispers colors are solid cremes. There's no pearlescense, shimmer, or metallics, just simple flat cremes. 

Zoya - Cala
Zoya - Cala
Cala (2 coats) is a nude creme with yellow undertones. Some polishes in Whispers are difficult to work with, but Cala applies really well and has perfect coverage.

Zoya - Lake
Zoya - Lake
Lake (2 coats) is a dusty, pale blue creme. Like Cala, it applies easily and lays smoothly on the nail. 

Zoya - Eastyn
Zoya - Eastyn
Eastyn (2 coats) is a dark grayish-lavender creme. This is the first polish I swatched from the collection that had a thick formula. It still evens out nicely with top coat, but applying it isn't the smoothest.

LVX Winter Resort 2016 Swatches and Floral in the Folds Nail Art

I've swatched LVX plenty of times here at Nailed It, but one thing I always like about their collections is their willingness to go outside the boundaries of what you expect to see in a seasonal collection. Yes, winter is usually dark reds and silver. But did you know it's also teal? The Winter Resort 2016 LVX line stretches those tired color muscles for winter into something unique and original.

I was inspired by this collection's soft, vintage shades to create "Floral in the Folds". These tiny little rosebuds were done with Bordeaux on a base of Lait.

Floral in the Folds by Katy @ Nailed It
Floral in the Folds
I'd love to recreate this delicate look using different shades for wedding nails!

LVX Winter Resort 2016 Swatches

Like all LVX collections, Winter Resort 2016 comes with six colors. Five out of the six are luscious, easy-to-apply cremes that cover in two coats. The last is a unique metallic that's already running low in the salon. Let's start with Saint.

LVX - Saint
LVX - Saint
I've dubbed Saint (2 coats) as a "gray-ple" taupe creme. It's very soft and subtle against my pale winter skin, but it doesn't wash me out.

LVX - Lait
LVX - Lait
Lait (2-3 coats) can be difficult to apply because it can look a little patchy due to it's slightly sheer formula. I'm happy to take on the challenge for this perfectly off-white, tinged nude creme. If you can't get the right coverage at 2 coats, you just need one more thin one.

LVX - Malbec
LVX - Malbec
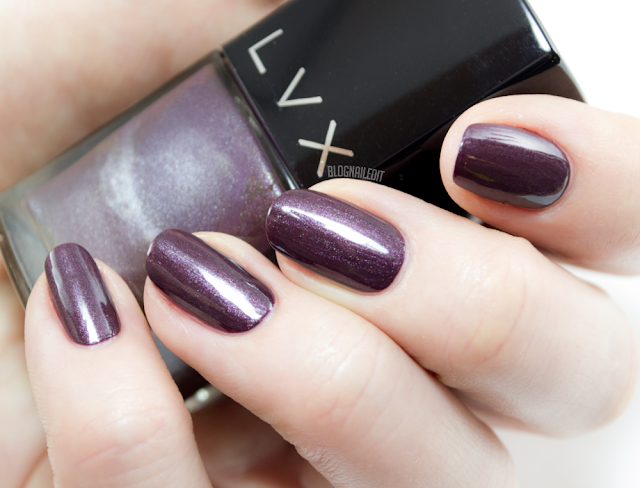
If you Google "malbec", you'll likely get image results for a dark red win. Alongside it, you may also see this LVX shade similarly named Malbec (2 coats). I would describe it more as a dark mulberry shade. What separates it from the wine could also be the flecks of holographic sparkle that turn it into a metallic polish. How great would wine be if it also included rainbow sparkles? Basic bitches would buy that up in a heartbeat (me included).

OPI Starlight Collection Swatches with a Melting Moon Manicure

OPI has two fabulous new collections coming in (the Hello Kitty collection and the New Orleans collection), but my favorite 2015 release might have to be what I'm sharing with you today - the Starlight collection. This huge, 18-piece collection is chock-full of amazing glitter, chrome, and even some holographic. I'll let the collection do most of the talking, but I have a few things to call out.

First, some of the glitters are...strange. A few of the chromes have glitter buried in them, which come out looking odd. To me, it looks like someone accidentally got glitter or dirt trapped in their polish and just left it that way. Not my favorite look. That being said, it might be perfect for someone else, so I'll just give my honest review as always and let you make your own decisions.

To start the swatches, here's a fun "Starlight-inspired" look and name. Everything seems to have some ties to space, so I'm calling this "Melting Moon".

Melting Moon

Melting Moon was created with two Starlight shades - I Drive a Supernova and I'm in the Moon for Love. First, I created a half-moon shape at the base of the nail with a small detailing brush. Then I brushed up toward the tip of the nail in small little strokes. Super simple!

Now strap in for all 18 swatches from Starlight, and be sure to let me know which is your favorite!

OPI - By the Light of the Moon
By the Light of the Moon (2 coats) is one of those weird, buried glitter chromes that I just can't get my mind around. The glitter is all large, hexagonal shaped, and it's paired with a silver chrome. Two coats is plenty for coverage, so that's good.

OPI - Ce-Less-tial is More
OPI - Ce-Less-tial is More 
As much of a disappointment as By the Light of the Moon was to me, Ce-Less-tial is More (2 coats, no top coat) is a home run. The dense glitter mix is rosy-gold with...wait for it...rainbow glitter too! You're looking at 2 coats with no top coat. I love this one, especially in gel because then you lose the chunky, gritty texture that you get in regular lacquer.


OPI - Center of the You-niverse
OPI - Center of the You-niverse 
The darkest shade of the collection also happens to be fabulous. Center of the You-niverse (2 coats) is a charcoal jelly with silver micro glitter and little flecks of matte black glitter. It has a bit of texture to it, but a top coat wipes it out for the most part.
New Video Tutorial - How to Remove Gel Polish at Home

Happy 2016 everyone! To celebrate, I've made a video for you all. It's been 2 years since my last YouTube release, so I'm excited to start the year off with a bang like this.


I rang in the new year with gel polish on my nails, but before taking it off, I thought it'd be a nice idea to put together a little how-to video on properly removing gel...at home!


Check out the video and feel free to leave comments or feedback.